In today’s article, we’re going to explore how to create mind-bending optical illusions using the power of AI. I absolutely adore optical illusions, and the technique we’re going to delve into is quite reminiscent of QR codes.
While there are similarities, there are also fascinating differences, and we’ll explore them together. I’ll even showcase some optical illusions I’ve created using this method.
So, get ready for some fun and creativity!
Let’s Get Started: The Tools You Need
In this case, our main tool is a model called “Controlnet QR Code Monster v2 For SD-1.5.” This model is incredibly versatile, and you’ll find it helpful not only for optical illusions but also for creating QR codes.
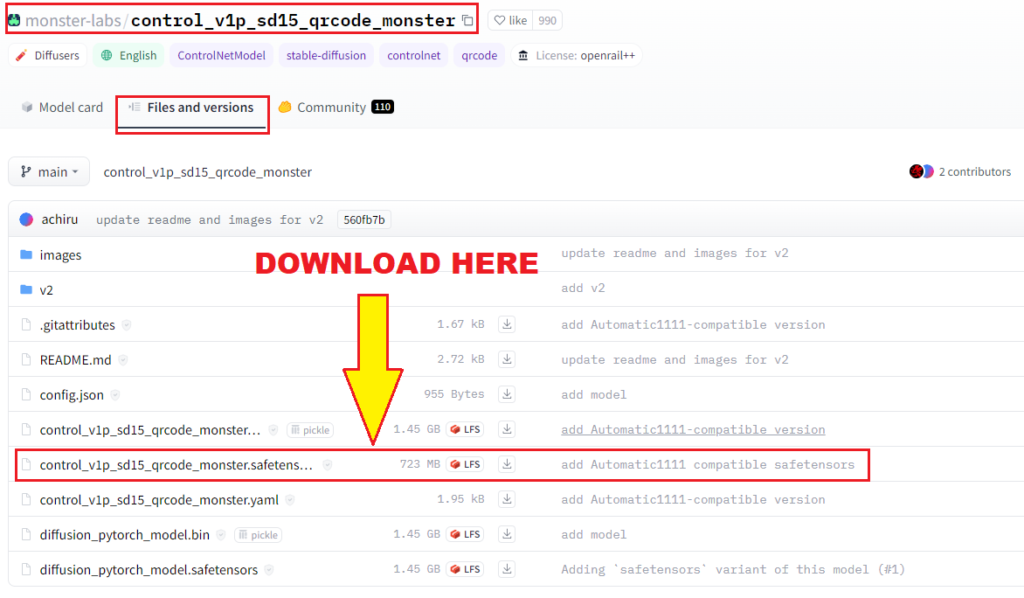
You can find the download link for the “control v1p SD 1.5 QR code monster” model in the article.
However, please note that this model is specifically designed for working with QR codes.
When it comes to optical illusions, you can choose a stable diffusion model based on the type of image you want to create.

There are models suited for realistic, cartoony, and various other styles, so you can select one that suits your vision.
Setting Up the Model
Before we dive into creating optical illusions, we need to configure our model. Here are the key steps:
- Enable the Control Net: In your control net settings, ensure that it’s enabled. This is the first step to give the model a sense of control over the image generation process.
- Choose the Model: As I mentioned earlier, select the appropriate stable diffusion model based on your desired image style. If you have a preferred model you’ve used before, feel free to stick with it.
- Control Weight: This parameter determines how much control the model has over the image. You can experiment with this value to get the desired effect. Start with a value like 0.95, and adjust as needed.
- Control Step: The control step influences the level of control at the beginning of the process. A value around 0.15 works well, but feel free to tweak it.
- Ending Control Step: This parameter sets the control level towards the end of the process. A value of around 0.9 often creates a balanced result.
How to create the Optical Illusion?
Now, let’s jump into the exciting part – creating optical illusions! To do this, you’ll need an outline of the subject you want to incorporate into your picture.
It can be a character, a logo, a word, or even something you’ve drawn yourself. For demonstration purposes, let’s choose an outline randomly.
In this case, we’ll use an outline of the legendary Donald Duck.
Here are the details you can configure to create your optical illusion:
Caption: This is where you describe your image. You can play around with it, but for our Donald Duck optical illusion, we’ll go with “Masterpiece Disney, colorful, ultra-high detail, sharp focus, cinematic lighting, 8K.”
Negative Prompts: You can add negative prompts to guide the model. For this example, we’ll use “blurry, pixelated, monochrome, text, writing, numbers, watermark.”
Sampling Method: Choose your sampling method based on your requirements. We’re going with “plus plus” at 1024.
Sampling Steps: Set the sampling steps to 45.
With these settings, the model will aim to fit your chosen outline into the world of Disney. Keep in mind that the level of control weight you set can make the outline more or less visible.
You can experiment with values, even going as high as 2 for maximum visibility. Play around to get the perfect effect for your optical illusion.
Exploring the Optical Illusion Results
Now, let’s check out some results to see the magic of optical illusions in action. Remember, these results can be influenced by your choices, including control weight and the model you selected.
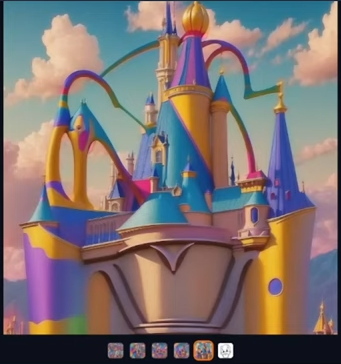
Donald Duck Incorporation: Squint your eyes a bit, and you’ll start to see the shapes that makeup Donald Duck’s outline. The level of detail can vary based on your settings.
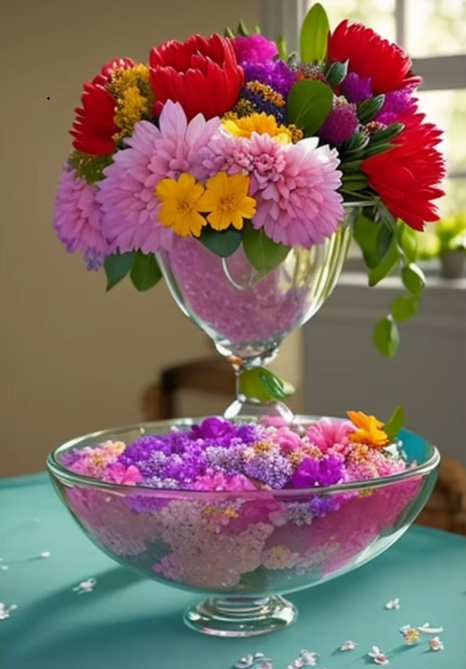
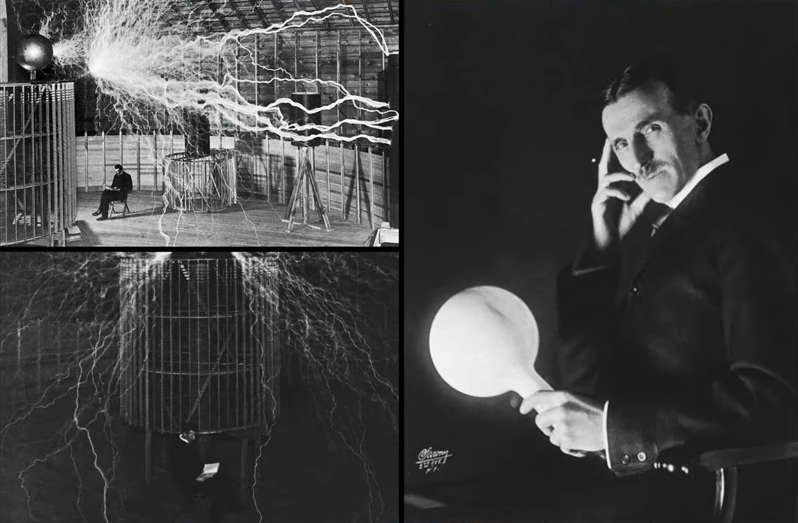
Floral Optical Illusion: In this example, the illusion appears to be a floral arrangements. However, if you squint or minimize the picture, you’ll notice it’s actually a representation of the great Nikola Tesla.
Nikola Tesla Optical Illusion: Here’s another result that prominently features Nikola Tesla. It’s quite clear, and you don’t need to squint to see the famous inventor’s outline.
John Lennon Optical Illusion: In this optical illusion, John Lennon’s outline is incorporated. When you minimize the picture, you’ll see the musician’s iconic profile.
Che Guevara Optical Illusions: We have a series of optical illusions featuring Che Guevara. You can notice his face incorporated into various scenes, like a group of Bolivians smoking cigars.
The incredible aspect of this technique is that you can use it to create a wide range of effects. Whether it’s for a t-shirt design, advertising, or simply for fun, you can incorporate your own outline, a logo, or any subject into a captivating image.
The level of control you exert over the process allows you to fine-tune the illusion to your liking.
Hidden Messages: A Twist on Optical Illusions
Beyond incorporating subjects into your images, you can also have some fun with hidden messages. By introducing specific words or phrases, you can create intriguing effects. Here are some examples:
Break Optical Illusions: Another set of illusions hides the word “break.” Depending on the control weight, you can make it more or less visible.
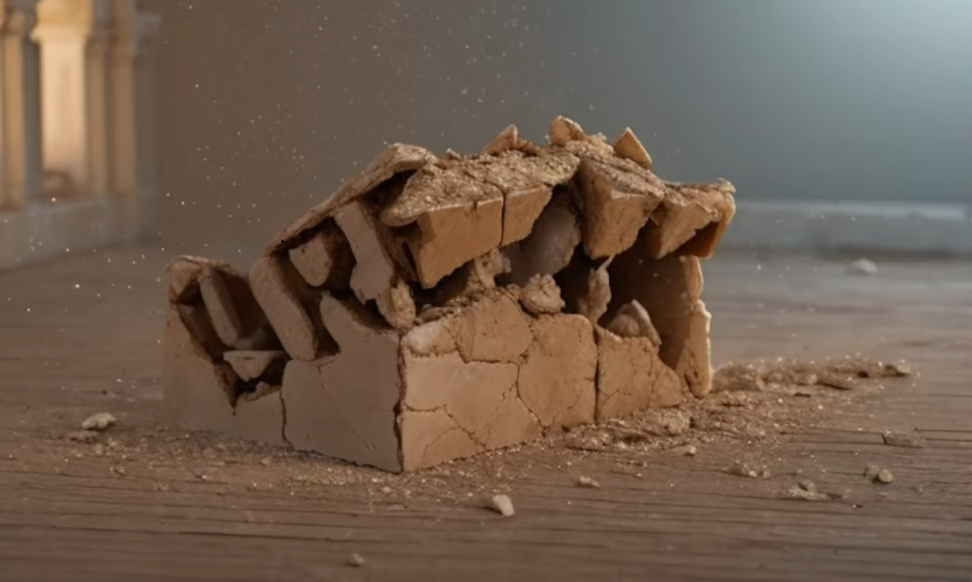
Subtle Sublime Effects: By carefully tweaking the settings, you can create illusions where the hidden message is subtle and not immediately apparent, providing a cooler effect when discovered.
Get Creative and Share Your Work
The possibilities with this method are truly endless. You can experiment with different outlines, subjects, and messages to create unique optical illusions that captivate and surprise.
Once you’ve crafted your masterpiece, we’d love to see what you’ve come up with! Share your creations with us on Twitter or via email. We can’t wait to showcase your cool work to our community.
Conclusion:
That’s a wrap for today’s article! We hope you’ve enjoyed this exciting journey into the world of optical illusions using AI.
Stay tuned for more incredible content in the days and weeks to come. We’ve got plenty of cool stuff in store for you, so keep an eye out. Until next time, keep creating and exploring the endless possibilities of AI-driven creativity.